Hi, President Obama!


This week I knocked on doors as a part of a congressional campaign for the very first time.

I had no prior experience with canvassing but Katie Porter’s campaign team got me ready and up to speed in about 15 minutes. Although I am a medical student, and pretty busy in the midst of residency applications, I wanted to do something more than complain about how frustrating our politics have become. So I showed up.

That is all it took. The campaigns are prepared to galvanize their volunteers. They are ready and waiting for people like us to show up and spend an afternoon knocking on doors.

The people I spoke with when canvassing had two things in common:

1. They were fed up with the current administration.

2. They did not know who they were voting for in November.

Knocking on doors makes a difference. The people I spoke to were so frustrated with current politics but didn’t know that they have an amazing candidate running for office in their home district! Now they know and they thanked me for coming by to tell the good news and how they are looking forward to voting in November.

Now, even though I have been interested in healthcare policy for a while now, politics has always felt somehow far removed. So far that, maybe, at times, I questioned the power of my vote or the importance of being engaged in politics especially at a time where the headlines are unrelenting, delivering blow after frustrating blow related to this current administration. But spending an afternoon actually talking with Americans about the upcoming election erased my doubts and affirmed that participating matters.

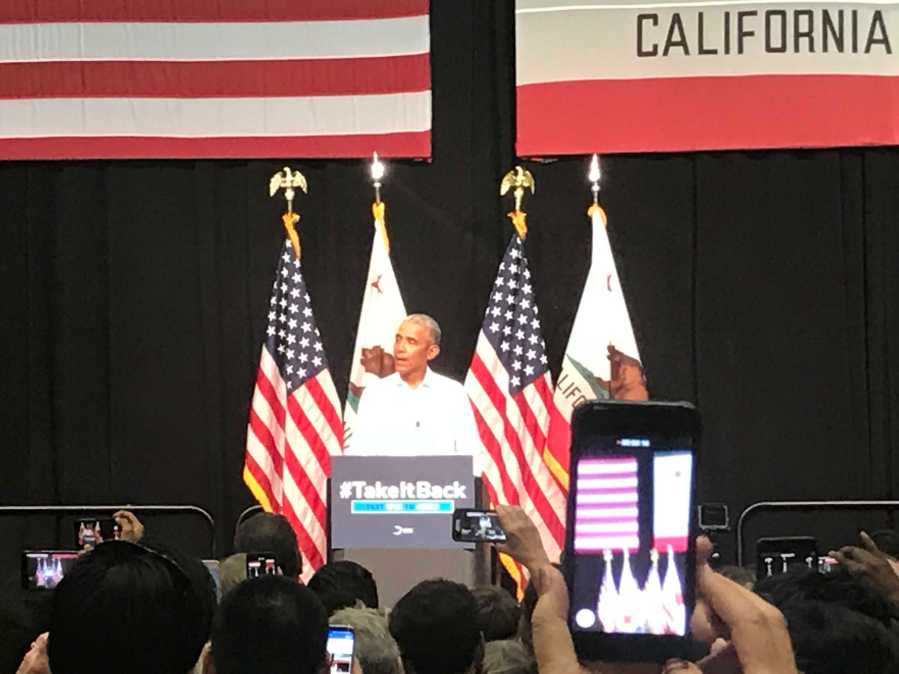
My commitment to staying engaged was profoundly affirmed this morning when I saw President Barack Obama speak at a rally in Anaheim. My husband and I were lucky enough to get tickets to this event (another benefit of being involved!).

The rally started with several speakers, one of which was delivered by a woman who shared a story about her daughter who was born 6 weeks early. The resulting two week NICU stay led to a $90,000 bill and her daughter’s history of prematurity could be considered a pre-existing condition for the purposes of insurance coverage in the future. The speaker shared that Obamacare provided her with hope, comfort, and coverage for her daughter.

As a fourth year medical student applying for residency in obstetrics and gynecology, this person’s story weighed heavily on me. Expectant parents should not have to worry about medical bankruptcy. That is not a normal part of pregnancy.  The continued existence of the ACA is so important for patients, for Americans. 

President Obama’s speech focused on the importance of engagement and the dangers of apathy. As a medical student, and soon to be future physician, his words resonated strongly with me.

I believe that you cannot effectively practice medicine with your eyes closed.  We need to know what is going on, who is shaping healthcare, and how we can make a difference. If physicians don’t use their voices, and their votes, to shape healthcare policy then profit will always trump patients. To me, caring for my patients includes being informed (even if the headlines are anxiety-inducing) and actively advocating for a healthcare system that puts patients first by a) voting and b) volunteering for candidates that value patients.

President Obama came out to speak on behalf of some amazing candidates running for office right now. They are the type of people that I believe can make this country better, stronger, and healthier. But these candidates need our help. Democracy is participatory by definition so if we want it to work…we need to do our part. 

If you are still reading this then I challenge you to commit one afternoon (~3 hours) to volunteering to a campaign near you some time between now and November.

This week I knocked on doors for Katie Porter of the 45th district but, really, I was knocking on doors for my values, for my future patients, and for my country, and, what’s more, so can you.

Volunteer for Mike Levin of San Diego!

Volunteer for Katie Porter of Irvine!

Volunteer for Harley Rouda of Newport Beach!

Volunteer for Katie Hill of Los Angeles!

Volunteer for TJ Cox and Josh Harder of the Central Valley.

As if it were serendipity: a small moment at the San Diego Women’s March 2018

When I entered medical school, the statistics told me there were more women students than ever before joining the field. Yet, I still find myself confronted with experiences that remind me, as of right now, it is still male-dominated. As a sort of exercise in self-discovery, I have started reading more about women’s history. Starting with reading about the battle over the Equal Rights Amendment, I thought looking back through accounts of this movement might help me better understand my experiences. At first, I wasn’t sure of the role that my femininity played in my experiences in medicine. I realized that what I wasn’t seeing, just below the surface, was that I was standing on the shoulders of thousands of women who came before me to make my career possible. Women whose legacies are not yet complete and of which I have inextricably become a part.

In 2018 is it really possible to feel as if you don’t belong in a career solely because of your gender? Isn’t that the stuff of history? I imagine the women who advocated for the Equal Rights Amendments in the 1970s would likely be shocked and probably offended by my ignorance. The fight for Women’s Lib is hardly history, the ERA movement spanned from 1971-1982, just about ten years before I was born.

Congress passed the Equal Rights Amendment in 1971. The text was simple and read:

Section 1. Equality of rights under the law shall not be denied or abridged by the United States or by any State on account of sex.

Section 2. The Congress shall have the power to enforce, by appropriate legislation, the provisions of this article.

Section 3. This article shall take effect 2 years after the date of ratification.’

Between 1971-1977, thirty-five states ratified the amendment, falling just three states short of adoption. A cohort of conservative women with Phyllis Schlafly as the most prominent figurehead, led the fight against ERA. Groups like “Women Who Want to be Women” and “Stop ERA” put together campaigns based on the premise that men and women did not have equal roles in society. They coordinated lobbying campaigns where they sent homemade pies to members of Congress with their letters about ERA opposition. In Schlafly’s article “What’s Wrong With ‘Equal Rights’ For Women,” she writes: “Why should we lower ourselves to “equal rights” when we already have the status of special privilege…Why should we trade in our special privileges and honored status for the alleged advantage of working in an office or assembly line? Most women would rather cuddle a baby than a typewriter or factory machine.” She makes many arguments to this effect without ever addressing how women who dream a different dream could possibly thrive in the world she describes. To be clear, I do not admonish homemakers. My father was a homemaker and stayed home to care for my brother and me. I have the utmost respect for people who elect to take care of their families full time. I think it is crucial that the role of “homemaker” remain a choice and not a pre-determined and exclusively female obligation. How could someone like me reach my goals if Schlafly’s worldview had persisted. What if her framework had become mainstream? I can only imagine what it must have been like to be an ERA advocate in the 70s with your dreams and opportunities seemingly on the line.

And that brings me to the 2018 San Diego Women’s March.

IMG_3362

I made a sign displaying the text of the ERA to carry as I marched with thousands of San Diegans on Saturday. A woman approached me and said “Excuse me, miss. I just want to say that I love your sign. I was at the meetings in Florida fighting for this and I still think we need to adopt the ERA!” This woman told me how much it meant to her to see someone still advocating for this amendment that she had fought for during one of the peaks of the Women’s Lib movement. I asked her if she would like to take a picture with my sign and I was honored to snap the photo of her smiling broadly with my ERA sign standing next to her husband, smiling just as wide.

Florida was a battleground state for ERA ratification. I wish I could have heard her stories from 1973 but I lost her in the crowd at the march. The National Organization for Women Florida chapter was established in 1973, in part to organize the pro-ERA efforts. Florida never ratified the ERA. The time period for ratification and ERA voting ending in 1982. Of note, many of the protections pro-ERA advocates were fighting for are provided by the 14th amendment. Yet, to this day, it takes fierce advocates like Ruth Bader Ginsburg and the ACLU to make sure women are actually protected to the full extent of the law (for more info check out this episode of More Perfect).

My encounter with this woman at the march was a wake up call. I wasn’t reading about women’s history. This is a living history. Just yesterday, I marched alongside a woman who fought for the ERA. I know that fight can’t possibly feel like history to her. We are not generations away from a time where people felt comfortable to say that men and women were not equal, that we have pre-determined roles to fulfill in society, that big ideas, hopes and dreams are for men while women are to be homemakers to pave the way for their sons to dream and to choose his own destiny while their daughters walk  a pre-determined path. This is in our lifetime and could easily be our reality if it weren’t for the women who came before us paving the way for choice and opportunity.

Yesterday I met history in real time and realized, this isn’t history at all. Not yet, at least.


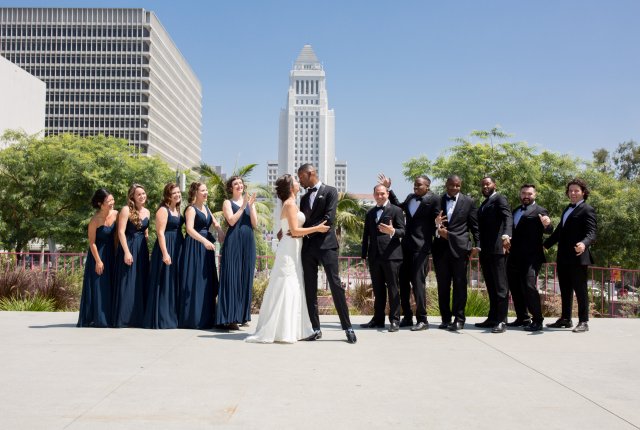
Bridal Party Photo Checklist!

Photo Credit: Lily Love 

Planning your wedding day photos can feel like a daunting task. To simplify the process, figure out your priorities and intention for using the photos.  For example, are these photos destined to be framed and on your wall, just for Facebook, or for a printed wedding album? Make a list of “must have” photos to share with your photographer that you think you would want framed/saved/preserved forever and ever and don’t sweat the other stuff. There will be fun/candid moments that pop up when taking your photos that your photographer will capture so you should end up with a perfect mix of your “must haves” and some unplanned/candid moments.

Must-have bridal party photo checklist!

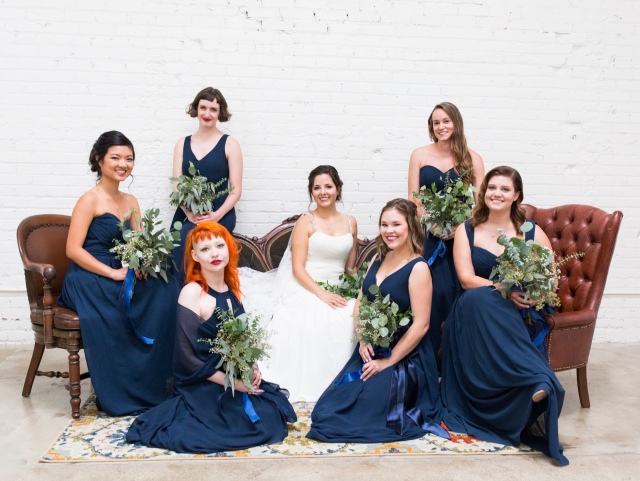
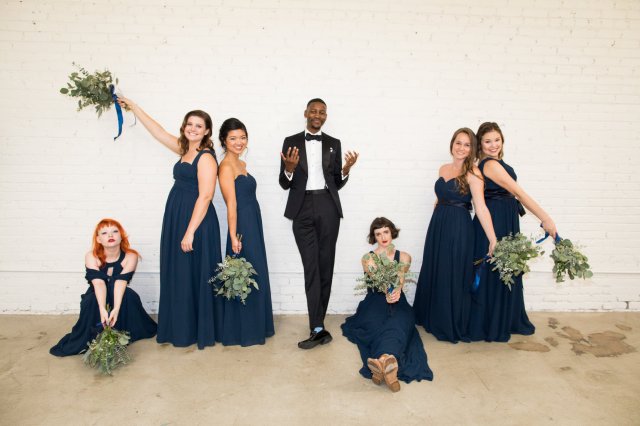
Bridesmaids

  1. Getting ready — we had monogram embroidered waffle robes and a champagne toast.
  2. With florals — greenery (eucalyptus leaves, succulents) and a couple white roses
  3. Formal — use furniture in whatever space you have so not all your pictures are in a straight line.

View More: http://lilylovephoto.pass.us/cecilia--rodney-wedding-81217

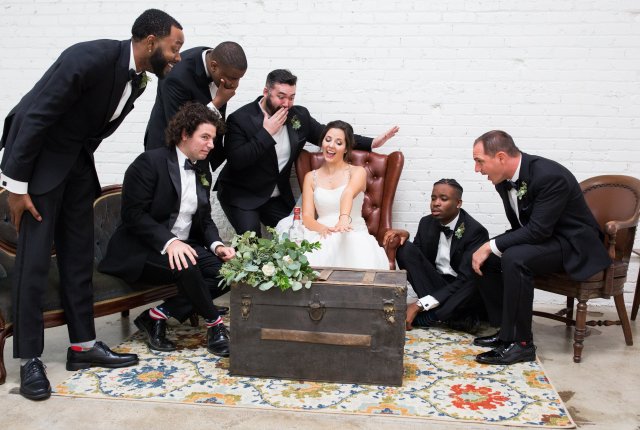
Groomsmen

  1. Getting ready — if your hotel has a classy lobby it is a great opportunity to grab a fancy tux pic.
  2. Formal
  3. Fun

7R4A2491

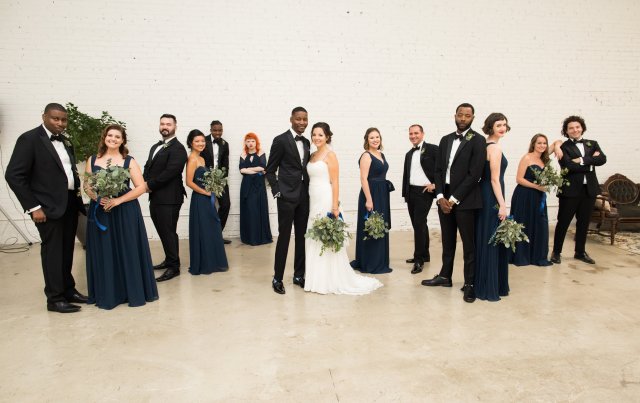
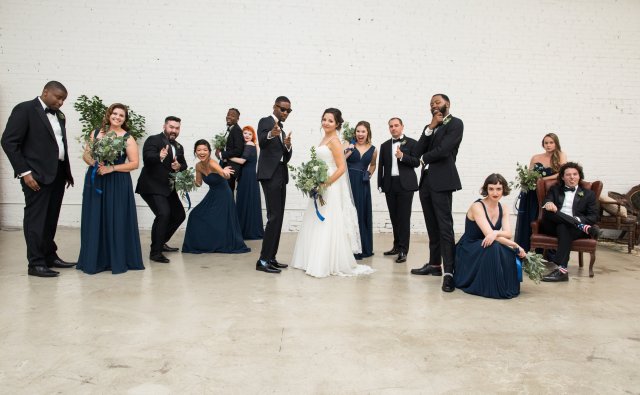
Whole bridal party 

  1. Classic
  2. Contemporary
  3. Fun
7R4A2216
Classic


View More: http://lilylovephoto.pass.us/cecilia--rodney-wedding-81217
Contemporary 
7R4A2502
Fun! 


View More: http://lilylovephoto.pass.us/cecilia--rodney-wedding-81217
Classic/Fun

Bride with groomsmen

5Q4B3129

Groom with bridesmaids

View More: http://lilylovephoto.pass.us/cecilia--rodney-wedding-81217

1:1 with each member of the bridal party 


Some photos that you might love love love on Pinterest and are fun to have but may not be worth the stress of formally planning. You can ask your photographer to snap these type of pics at any time (eg bride with a beer, socks, groups of shoes of any kind (groomsmen, bridesmaid, bride and groom…). Also, you don’t need to plan/stage bridesmaids helping with the bustle picture because…they really need to help with the bustle! It happens naturally and inevitably.  At the end of the day, were you really going to frame that pic of the groomsmen’s socks? Don’t sweat the small stuff!


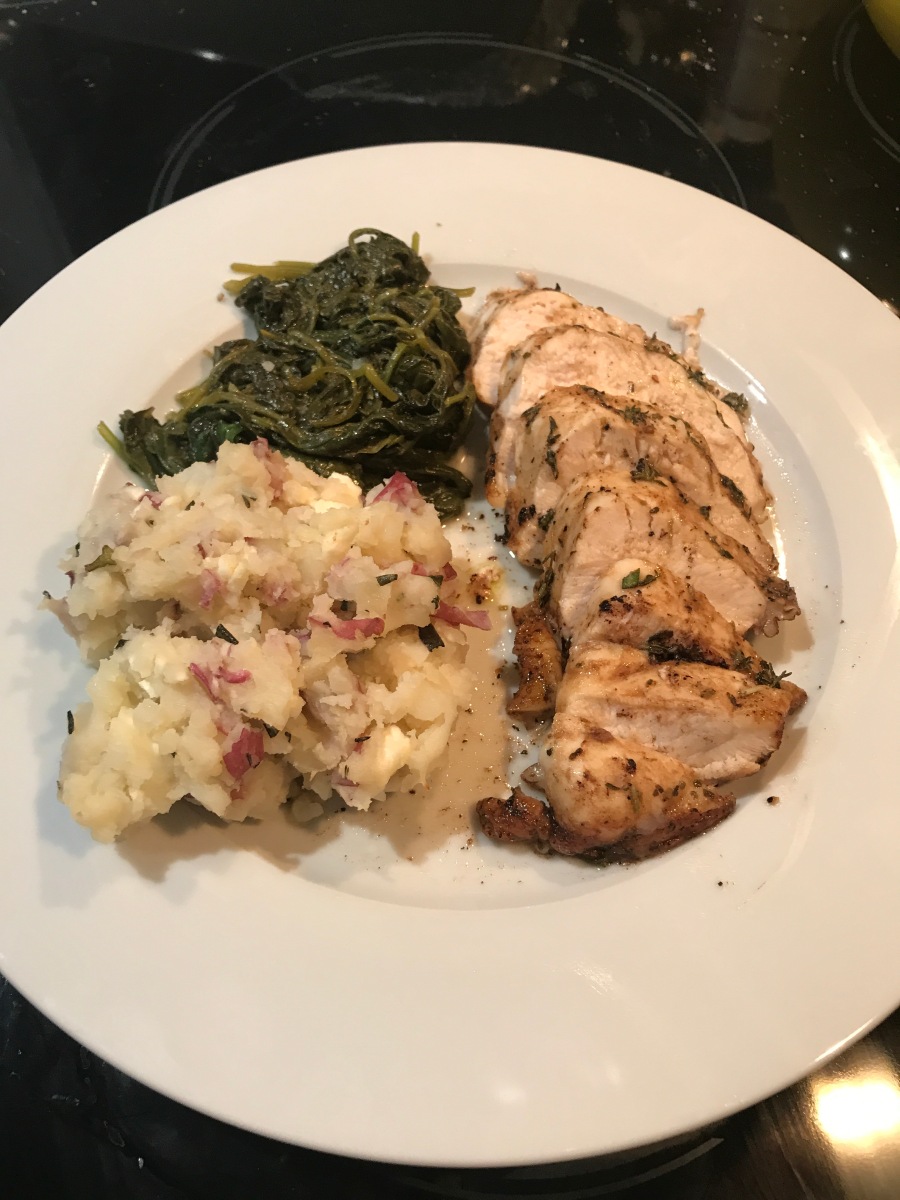
Feta Mashed Potatoes with Balsamic Chicken and Lemon Butter Spinach

I had my doubts about combining feta with mashed potatoes but it was totally worth the risk! Enjoy!

​​Check out Step 2 for a short cut for making roasted/mashed potatoes in about half the normal cook time!

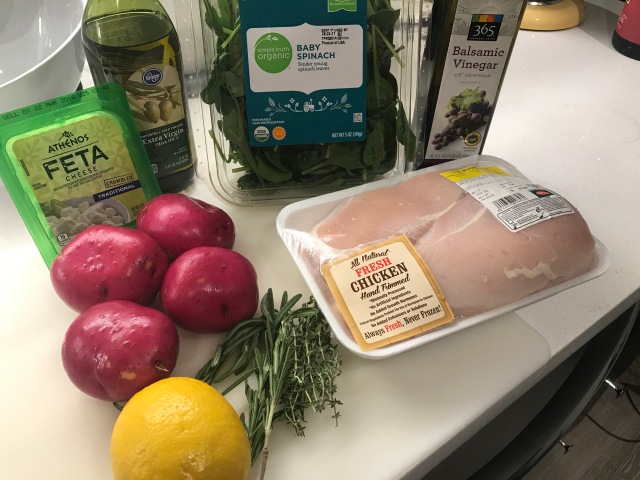
Ingredients:

  • Chicken breasts (not thin cut, get normal/full sized)
  • Spinach
  • 1 lemon
  • 1/2 stick of butter
  • Heavy Cream
  • Crumbled Feta
  • Rosemary
  • Thyme
  • Spices: garlic powder, onion powder, oregano, salt, peppter
  • Olive Oil

Instructions:

Step 1: Chicken

Pre-heat over to 400 degrees. Season both sides of the chicken breasts with salt, pepper, online and garlic powder, oregano, and fresh thyme. Pour 2 tablespoons of olive oil into a pyrex dish lined with tin foil. Coat chicken in olive oil but placing them in the pyrex dish and flipping them over.  Pour 1 tablespoon olive oil over the chicken. Pour 3 tablespoons of balsamic vinegar over the chicken breasts. Put in oven. Cook for about 30 minutes (until done).

Step 2: Potatoes

Want to get the potatoes done quickly? Bring water to a boil. Cut potatoes into 1 inch cubes. Place in boiling water for 8 minutes. Remove and place on a cookie sheet. Add chopped fresh rosemary to the cookie sheet then season with salt and pepper. Pour some olive oil on the cookie sheet with the potatoes. Place in oven to crisp up (about 7 minutes).

When the chicken is about 5 minutes from being done, take the potatoes out of the oven. Put into a mixing bowl and use a masher (or two forks) to mash your potatoes. Add 1/2 cup of feta, 1 tablespoon of butter, and 1/4 cup heavy cream to the bowl and mix well. Season to taste.

Step 3: Spinach

Melt 1 tablespoon of butter in a pot. Add spinach. Add juice of 1/2 lemon. Cover with lid and stir occasionally until wilted. Season with salt and pepper to taste.

Step 4: Put it on a plate!

img_2234


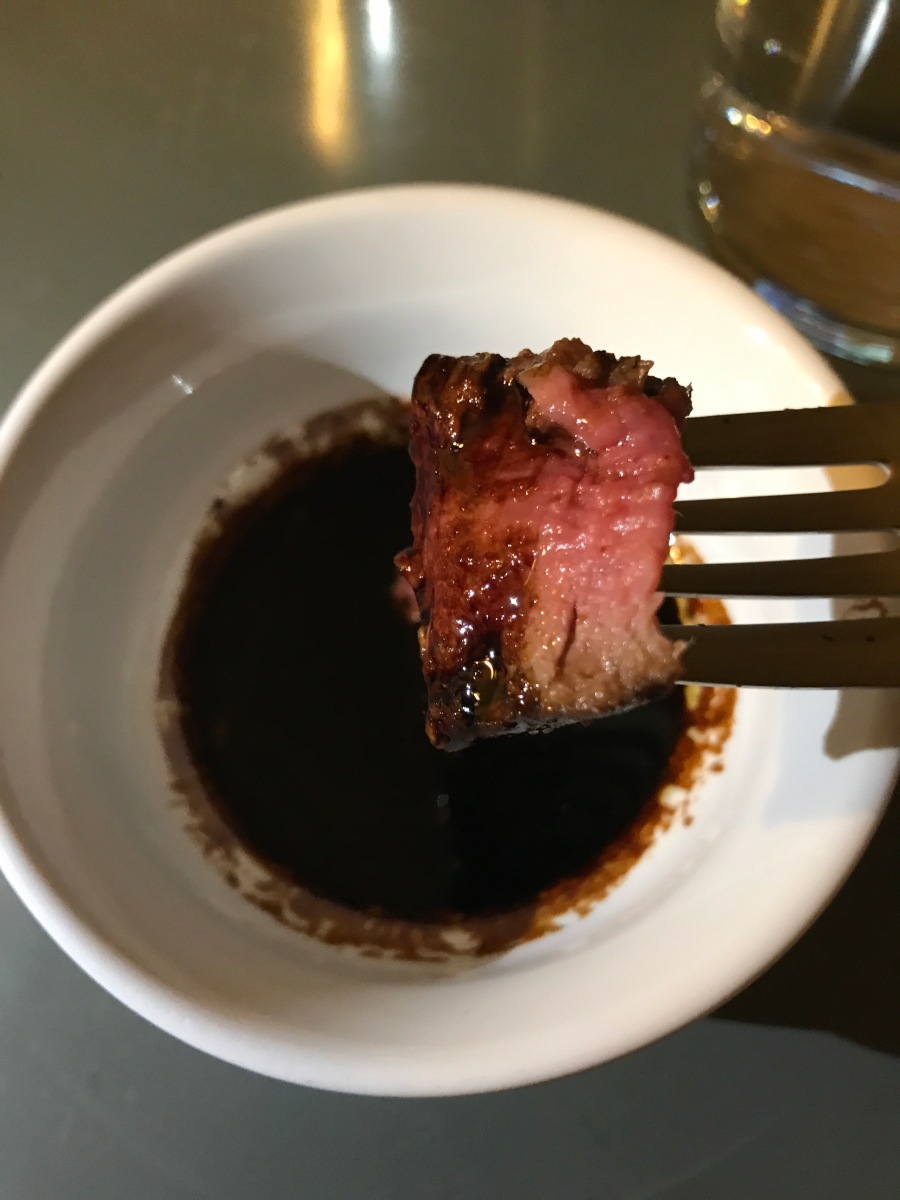
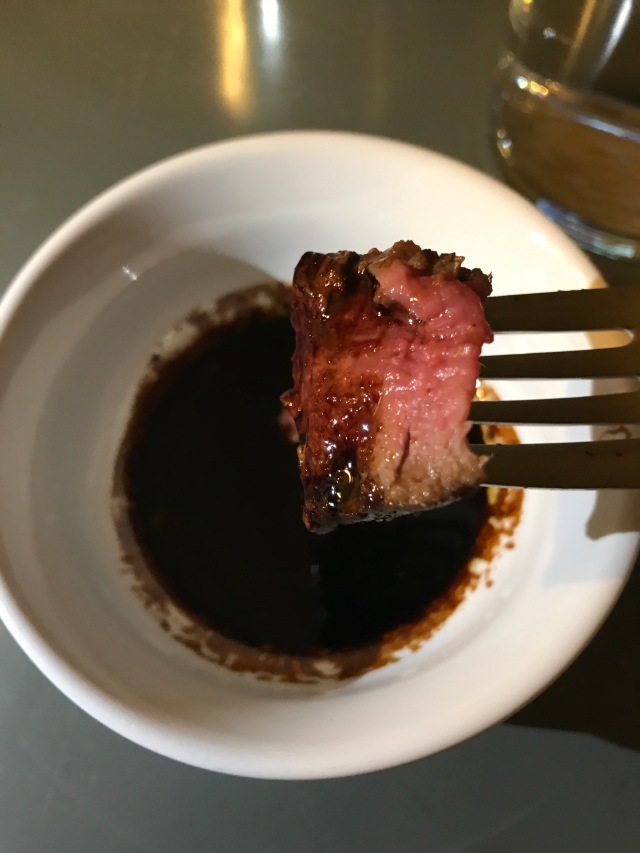
Honey Balsamic Steak Sauce

Whenever we have steak night I always stress about what kind of sauce to pair it with. I can’t bring myself to buy A1 steak sauce. Sometimes simply putting a dollop of horseradish seems sufficient to me. Other times, I just feel like there needs to be a sauce! 

My go-to is usually a red wine reduction but tonight I decided to try something new and wow! It was awesome! Awesome sauce, if you will. So here is how to make a sweet, buttery, yummy/nummy, sauce that is perfectly savory and beautiful to boot! 

Ingredients: 

  • 1.5 cups of balsamic vinegar 
  • 1 tablespoon of honey 
  • 1 tablespoon of butter 
  • Drippings from steak pan

Pour 1.5 cups of balsamic into a sauce pan. Simmer on low heat for 10-15 minutes until the liquid is reduced to the point where it can coat the back of a spoon. Once reduced, turn off the stove and add the honey and butter. Mix gently! Pour whatever drippings you have in the steak pan into your sauce and mix gently. 

Drip onto pieces of sliced steak while playing. Don’t drench the meat. The sauce is very rich! I put the sauce on the side tonight since it was an experiment but next time I will put directly onto the steak! Note: if the steak is not sliced ahead of time, the sauce will get absorbed into the charred edges. Use side dish for people to pour as needed during the meal, in this scenario. 

Summer Scampi

IMG_2147

The magic of cooking is that you can make your food your own. If you love butter, add extra butter. If you prefer your pasta al dente, stop cooking it a little sooner. If you love bacon, well, almost every recipe can benefit from a side of the good stuff. Take my recipes with a  grain of salt and  feel free to add your own twist!

Summer scampi is a shrimp scampi that is just light enough in its flavor to be enjoyed on a warm summer evening. The heirloom tomatoes are perfectly in season and the lemon juice gives the dish a brightness and lightness! The Italian parsley adds a fresh bite to the dish. This dish pairs well with Chardonnay.

Shrimp are inexpensive at the grocery store. I recommend getting them from the deli/seafood section and not buying them pre-packaged. I usually opt for pre-cleaned, de-veined, and de-shelled shrimp. You don’t need the shells for the sauce and this saves you a lot of time. I like to add other seafood options to my dish as well. For this, I opt for a bag of frozen mixed seafood which is cost efficient but still gives me a variety of proteins to add to the dish.

Ingredients – comfortably serves two with a serving+ of leftovers 

  • Fresh linguini (refrigerator section of most grocery stores)
  • 8 Shrimp
  • 1 cup of defrosted seafood mix (muscles, calamari, octopus, etc.)
  • 2 tablespoons of butter
  • 1 tablespoon olive oil
  • 1 cup of white wine
  • Juice from 1/2 lemon
  • 3 cloves of garlic
  • 2 heirloom tomatoes (about a cup of large dice)
  • Italian parsley
  • Garlic powder, onion powder, oregano, salt, pepper

Instructions:

Prep: Cut garlic cloves into a fine dice. Clean, de-shell, and de-vein the shrimp. Season the shrimp with salt, pepper, garlic powder, and oregano. Chop tomatoes into a large dice, set aside. Chop about 1/4 cup of parsley, set aside.  Defrost the frozen seafood in warm water (see my post on how to best defrost!).

Cook:

  1. Bring a large pot of water to a boil on a back burner.  Fresh pasta only takes 3-4 minutes to cook so save this part for last. In the meantime…
  2. In a 10in-12in pan heat 1 tablespoon of olive oil. Add the finely diced garlic to the pan and cook for 2 minutes. Add 1 tablespoon of butter. Add the 8 seasoned shrimp to the pan. Let cook for 1 minute on high heat. Flip the shrimp then add the juice of half of a lemon. Now add 1 cup of the seafood mix to the pan. Season with salt, pepper, onion powder, and oregano. Add 1 cup of white wine, bring to a boil, then set on low heat. Allow the contents in your pan to simmer for 7 minutes.
  3. Cook your pasta! Follow the instructions on packaging as cook time may differ by brand.
  4. Once pasta is strained, add 1 tablespoon of butter and salt and pepper to pasta pot. Mix.
  5. Use tongs to add the seasoned/buttered pasta to the pan of seafood/sauce. Mix gently but throughly. If your pasta seems dry, taste it then add more butter or more lemon juice, whichever flavors seems lacking.
  6. Add chopped tomatoes to your pan, mix then serve! Sprinkle freshly chopped parsley on top of the pasta while you serve.

Enjoy!

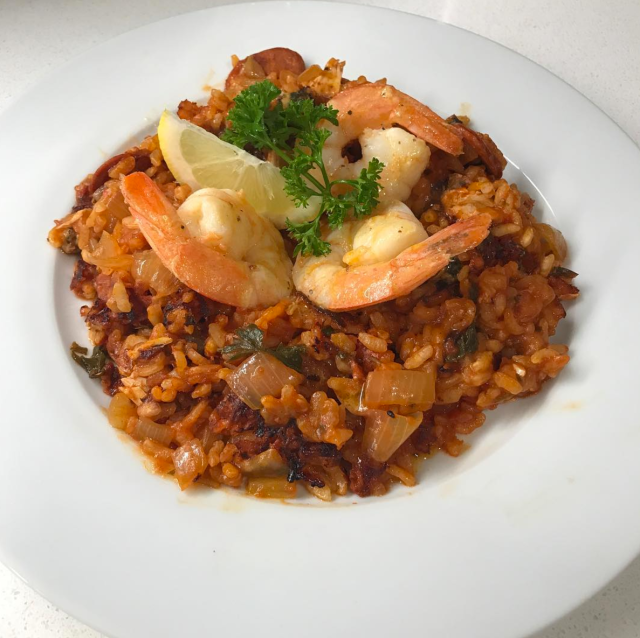
Italian Inspired Paella

Paella

Ingredients:

  • 1 can (15oz) crushed tomatoes
  • 1.5 cups Arborio rice
  • Frozen muscles, octopus, calamari
  • 6 shrimp
  • Portuguese sausage (chorizo or kielbasa also work)
  • Chicken (I used leftover rotisserie chicken)
  • 1 Onion
  • Parsley (Fresh) (Italian parsley works well too!)
  • 3 Cloves of garlic
  • Olive oil
  • Spices: Paprika (smoked), garlic power, onion powder
  • Lemon wedges

STEP ONE: The Sofrito Heat olive oil in a pan then add chopped/diced onion and chopped garlic. Season with paprika, salt and pepper, then cook for 3-4 minutes, until translucent. Add a handful chopped parsley (about a cup). Cook for 2 minutes. Add can of crushed tomatoes and simmer for about 5 minutes.

STEP TWO: The Rice Add 1.5 cups of arborio rice to the pan, stir, then pour in 1 cup of water and stir until well mixed.  Add a teaspoon of paprika, onion powder, and garlic powder to the pan, stir. Put the lid on the pan and turn the heat down low.

STEP THREE: The Meat: Slice the sausage into thin pieces, about 1/2 an inch thick. Heat a separate pan and add the sausage slices. Cook until browned. Set sausage aside.  Chop and shred rotisserie chicken then squeeze the juice of half of a lemon over the cooked chicken and set aside.

Using the same pan that you used to cook the sausage (DO NOT WASH), add 1/4 tablespoon of butter. Once butter is melted, add 6 shrimp to the pan and squeeze the juice of half a lemon into the pan and season with paprika, salt, pepper. Cook for 1-2 minutes on each side until the shrimp become pink and opaque. Set the shrimp aside.

Check on your rice, if it looks dry, add more water about 1/4 cup at a time.

STEP FOUR: Putting it all together: Take the lid off of the pan with your rice in it. Add chicken, sausage, and about 20 stems of saffron. Stiff very lightly (try not to disturb the bottom layer). Wait ten minutes. Check on rice. If it seems close to done (al dente, firm, most water is gone) add the muscles and calamari to the pan by burying each piece of seafood into the rice. DO NOT STIR. Cover with lid and leave for 8 minutes.

If you use frozen muscles/calamari make sure to defrost BEFORE adding to your paella. If you add the frozen seafood straight from the freezer the defrosting process will add a lot of extra water to your dish, diluting the deep flavors you have been building the last 45 minutes!

TO DEFROST: put frozen seafood into a plastic bowl and add warm water from the sink. Let sit for 5 minutes, drain, repeat. Do this while you prep the rest of your ingredients and by the time you are ready to add the seafood they will be gently defrosted!

STEP FIVE: Serve! Use a spatula to take a heaping portion of paella out of the an. FLIP the paella when you place it on the plate so the crispy side is facing up (treat the paella on your spatula lie a pancake and flip it!). Push the rice to the sides of the plate leaving a shallow valley in the center of your plate. Add three shrimp, a lemon wedge, and a little fresh parsley.

Pairs best with: white wine (Pinot Grigio > Sauvignon Blanc >  Chardonnay) or you can be ultra fancy and make yourself some sangria!

Wedding Dress Shopping: how to make your dress one of a kind without breaking your budget

Unsolicited yet mildly interesting advice: how to have a one-of-a-kind wedding dress without going over budget.  

Exactly one year ago today I bought my wedding dress!

My wedding budget priorities were: food and venue. I did not budget a lot of money for my wedding dress. You can only wear it once after all! I had planned to try on various styles of dresses at David’s Bridal with my family and then order or rent a similar style online to save money.
Once I put on my dress, the plan changed. I loved it. However, since I hadn’t intended on actually purchasing a dress that day, I didn’t ask for the price or even provide the woman helping us at the store with an acceptable price range! My anticipation rose while I waited for the verdict. Turns out, my dress was on sale for only $199!

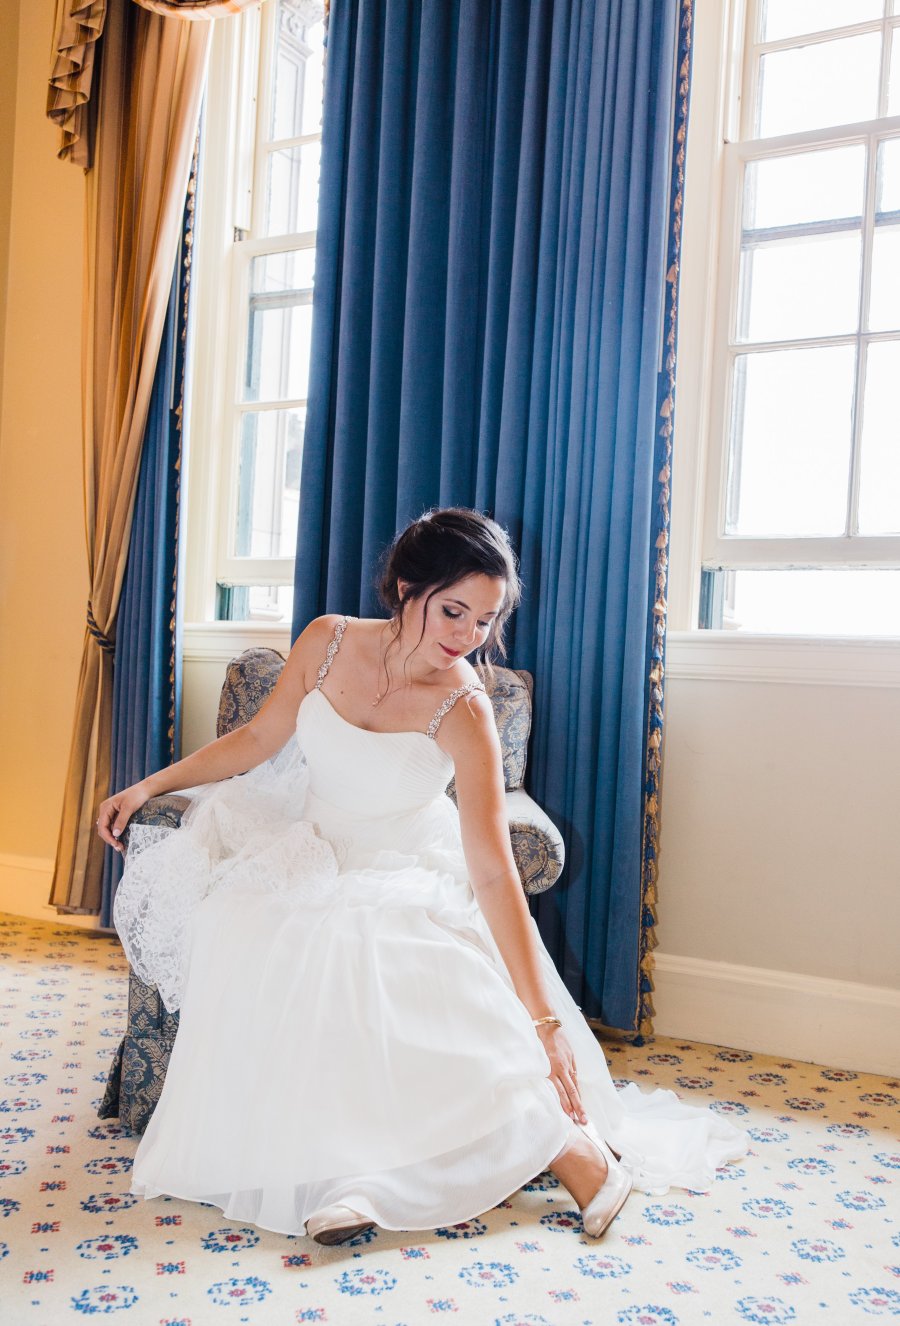
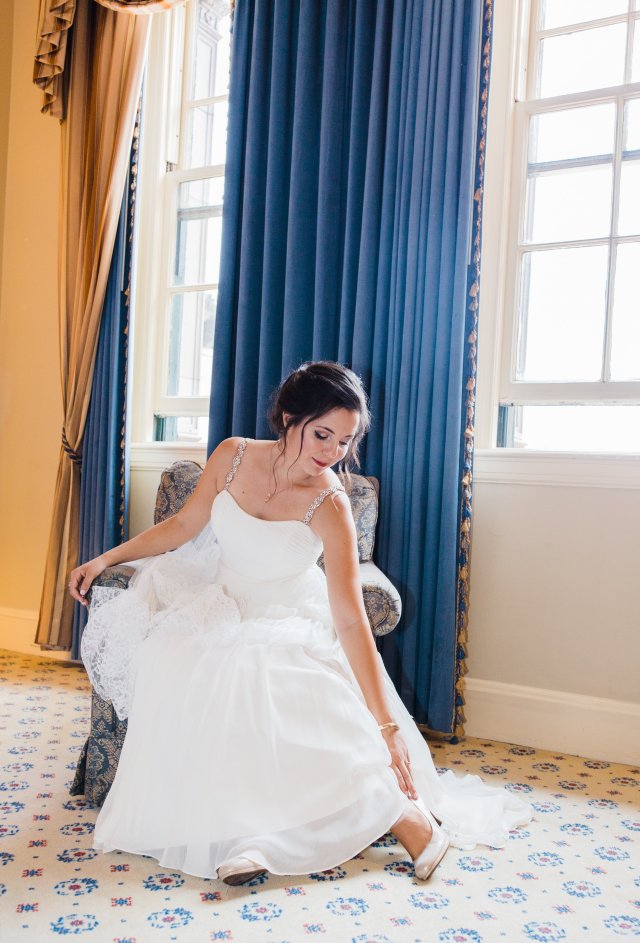
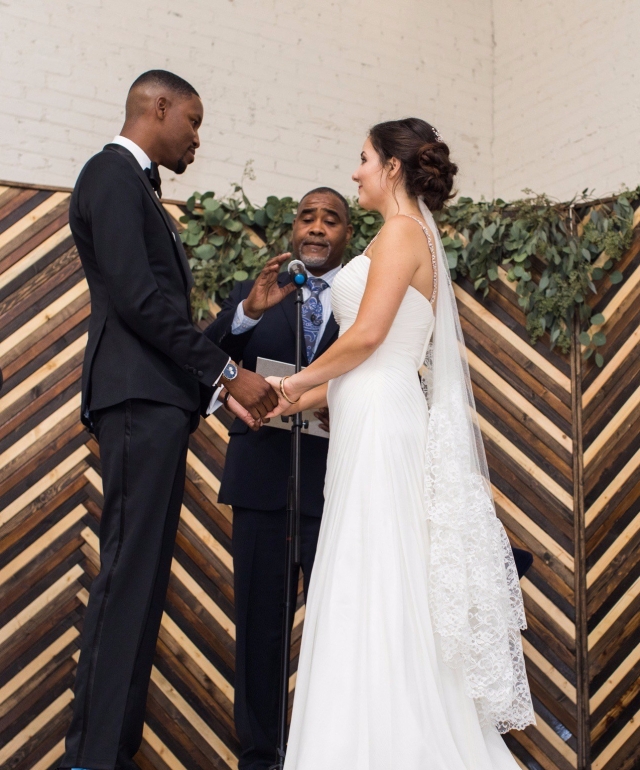
I loved my dress but I wanted to make it my own. I didn’t want a cookie cutter dress from a national retail chain, and yet, I loved and wanted the dress I found! With a little creativity I was able to make my dress one of a kind without breaking my budget. I ordered two sparkly waist belts from an Etsy artist and had them added to my dress as straps. It made my dress more comfortable and secure and added a tasteful amount of sparkle and individuality. My dress was a gem. Then I added some sentiment to my dress with a veil made from the lace of my mother’s wedding dress.
Three simple and affordable ways to make your wedding dress your own:

  1. Add a meaningful accessory. My veil is made from the lace of my mother’s wedding dress. Simply cut the lace (after being 1000% certain your mother is ok with this idea), buy a generic hair clip/comb, and sew the lace onto the clip. Don’t forget to buy extra bobby pins to hold it in place! You can use lace or fabric from your mom’s dress for other accessories as well like straps, a lining around the bodice, the tie of a waist belt, etc.
  2. Go to Etsy and check out wedding dress waist belts. The great part about Etsy.com is that you can reach out to artists and have your item custom made (from design to sizing!). I had two belts made at 15in long so it would reach from the front of my dress to the back as straps! You can also look for wedding dress sleeves , sashes, or general accessories.
  3. Bustle! You are going to have to pay for the bustle when you get your alterations anyways so you might as well make it pretty! Do some research before you pick your bustle style.You will likely have a preference. Some bustles look kind of awkward IMO, you don’t want a big lump at the bottom of your dress. I asked my seamstress to bustle in a way that would fit with flow of my dress and I loved it!


Wedding Dress Blog.png
On the far left: Trying on my dress for the first time. Middle and Right: my dress with accessories including the addition of custom made sparkle straps and a veil made from the lace of my mother’s wedding dress.

This slideshow requires JavaScript.


View More: http://lilylovephoto.pass.us/cecilia--rodney-wedding-81217

7R4A2385